
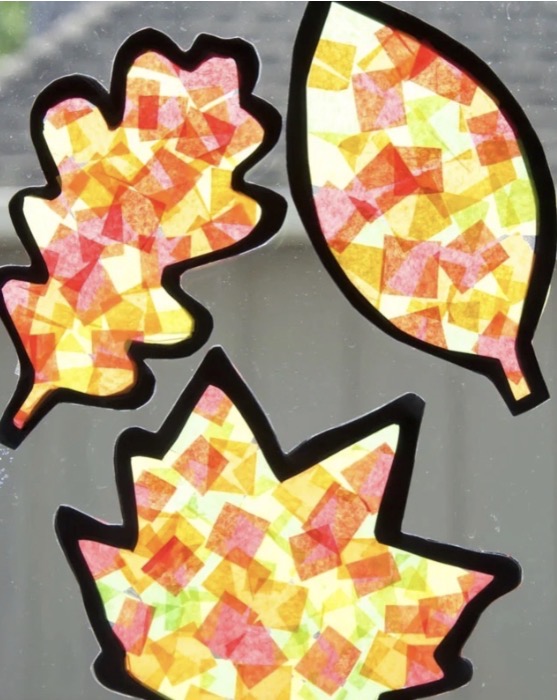
Craft credits to the Best Ideas for Kids
By: Reagan Anderson
Supplies Needed To Make Fall Leaf Suncatchers
· Tissue Paper
· Clear Contact Paper or Self-Adhesive Laminating Sheets
· Scissors
· Glue Stick
· Black Construction Paper
Instructions For Making a Fall Leaf Suncatcher Craft
· 1. Print out the leaf templates.
· First, print the leaf templates on white cardstock and cut them out.
· For thicker lines, we traced the templates onto black construction paper and then cut these out. You can also use the templates as is and cut out the center as your suncatcher outline.
· 2. Cut your tissue paper into small squares.
· Layer the tissue paper squares onto the contact paper or self-laminating paper. Don’t worry if you go outside of the outline, this will get trimmed off later.
· 3. Add another outline (optional).
· If you want both sides to have the outline, use a glue stick and glue the second leaf outline on top of the tissue paper. You can also just use 1 outline.
· 4. Add the laminating sheet backing.
· Place another piece of clear contact paper or self-laminating paper on top and press down to smooth out any bubbles.
· Trim the excess contact paper or laminating paper with scissors.
· 5. Attach to the window.
· Stick your suncatchers onto a window with tape and enjoy the beautiful fall colors as the sun shines through the tissue paper!
· We love how easy this fall craft is! To make a slightly different spin, use your contact paper to preserve fall leaves you find outside and display them on your window!