By: Sutton Rizzo
Materials:
· Wax Paper
· Crayons
· Craft Sticks
· Scrap Paper or Newspaper
Step 1:
Cut or tear a piece of wax paper off the roll about 10-12 inches long. Fold and cut the paper in half lengthwise. Fold each half in half again widthwise {don’t tear it!} so you now have two sheets to work with that are each about 5×10-12 with a folded seam.
Step 2:
Color your own design on one half of the wax paper or place crayon shavings into separate paper cups. Sprinkle the shavings {not too many} on one side of the wax paper.
Step 3:
Fold the wax paper over with the shavings inside. Place on a piece of scrap or newspaper, then cover with another piece of paper. With your iron on medium heat, run it across the paper with a small amount of pressure. This should melt the crayon shavings and fuse the wax paper together. Having the scrap paper will help absorb any crayon that melts out of the wax paper and protects your iron. You can make as many sheets as you’d like, but you only need 4 for this project.
Step 4:
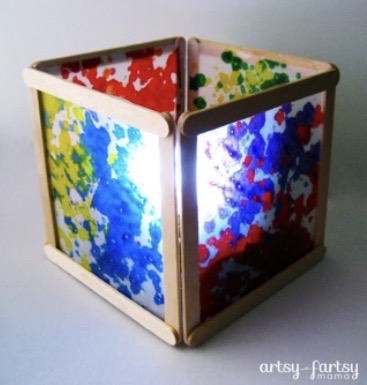
With a little bit of glue, or using a glue gun, glue the craft sticks together to make a square {as seen in image above}. Make sure all the craft stick frames are completely dry before the next step!
Step 5:
Carefully trim your wax paper sheets to about 4×4 inch square {measure your frame to make sure what will fit} and tape the sheet to the inside of the craft stick frames.
Step 6:
To put the lantern together, start by taping two of the frames together on the inside. Line the frame sides up and add a few pieces of tape. Add the third frame the same way, then carefully fold them all in to form a cube. Add the fourth frame, and tape both edges so that all the frames are connected.
Finishing Touches:
Now your lantern is done! Add a battery powered tea light or nightlight inside and admire your work!